What can best help you decide whether to choose a standard or custom display solution? Let’s analyze the specific numbers describing the time and costs associated with each option. This approach will provide you with a framework by which you can evaluate your options effectively and understand what suits your needs.
Quick Comparison:
- Standard Displays
- Quick start project with affordable time-to-market
- Reduced R&D design time
- Immediate availability
- Customized Displays:
- Matching specific application requirements
- Require design and manufacturing time
- Higher initial costs but cost-effective for mass-production
Standard Vs. Customized in Numbers
Starting with standard products, you are faced with a lot of convenient solutions. This means no time for development, no time for manufacturing, and no cost of the tooling or engineering needed. A product is waiting for you on Riverdi’s or one of its distributor’s shelves, you get it in one day and spend only the cost of a unit itself. This makes the standard product a super simple and quick solution to implement.
On the other hand, we have a customized product. If you choose this solution, we will usually need 5 to 10 weeks to design the display for you. There will be a lot of questions about the application and use cases you plan. All this to create a display tailored to your specific requirements.
After completing the design, the manufacturing process takes an additional 10 to 15 weeks, again depending on the extent of customization. In total, the entire process can take around 15 to 20 weeks.
The cost of a customized solution varies significantly based on the level of customization, depending on whether simple elements like glass or more complex components like PCBs need to be customized. Overall, several weeks and a few thousand dollars are typically required to develop a tailored product.
A Deep Dive into the Practical Side: Case Study
To illustrate the practical side of deciding between standard and custom, let’s consider a recent project involving a vending machine—a model example of an effective approach. The customer was developing a new outdoor vending machine concept and was unsure about the future production quantities. Initially, they chose a 10.1″ HDMI display, a standard product from Riverdi’s offer, which is suitable for outdoor use due to its strong construction.
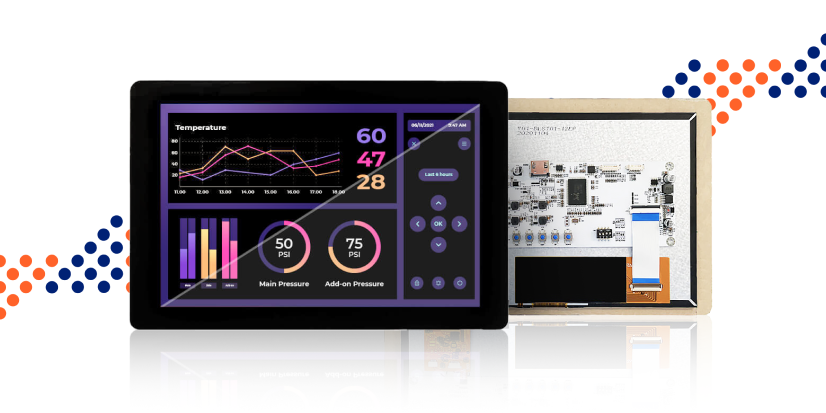
10,1” HDMI TFT display RVT101HVHNWC00-B


As production scaled and the customer gained clarity on the quantities and specific needs, he identified a requirement for enhanced durability to mitigate vandalism risks. Consequently, they approached us for customization. We strengthened the display by adding thicker glass and a UV film to protect against long-term sun exposure. This redesign ensured the product’s suitability for outdoor use, potentially extending its lifespan.
Although the customization process took several weeks, the transition from a standard product to a customized solution was smooth, ensuring the final product met the specific requirements.
An Approach That Works
Starting with a standard product, even if a custom solution is ultimately needed, is often the recommended approach. It allows for immediate prototyping and testing, reducing initial costs and time. Once the exact requirements and production quantities are established, a customized solution can be developed to address specific needs.
Simple Steps for Implementation:
- Start: Choose a standard product for prototyping.
- Test: Conduct initial tests and gather data on performance and requirements.
- Customize: If needed, move to customization for tailored solutions, ensuring all specific needs are met.
- Deploy: Implement the final product in large-scale production once all requirements are met.
Contact Riverdi for assistance in selecting the best display solution for your application. Our experts can provide practical advice and help with product selection.
Summary and comparison of both solutions
| STANDARD DISPLAYS | CUSTOMIZED DISPLAYS | |
| Evaluate your immediate needs | Ideal if you need a quick, ready-to-use solution with no development or manufacturing time. Products are available off-the-shelf and can be received within a day, with no tooling or engineering costs. | Consider if you have specific requirements that standard products cannot meet, like operating in extreme conditions or decorative cover glass. |
| Assess the project timeline | No time required for development or manufacturing. Immediate implementation is possible. | Design phase takes 5-10 weeks, followed by 10-15 weeks for manufacturing, totaling 15-20 weeks. |
| Understand the costs | Only the cost of the display unit, with no additional costs for tooling or engineering. | Costs may range from $500 to $5,000 or more depending on the complexity of customization, such as glass thickness or whole PCB redesign. |
| Consider prototyping and testing | Excellent for initial prototyping and testing to validate concepts quickly and affordably. | Start with standard products for prototypes; move to customization once specific needs and production quantities are clearer. |
| Factor in business risk mitigation | Useful for initial testing and small-scale production, mitigating early-stage business risks. | Necessary for complex large-scale production or when specific challanges, such as vandalism or environmental factors, require enhanced durability and custom features. |
| Plan for scalability | Most suitable for initial market testing and small production runs. But it also may be your final mass-production solution. | More cost-effective for large-scale production, allowing for tailored solutions that eliminate unnecessary components and meet exact requirements. |
DISCOVER OUR
Whitepaper
Achieve the perfect user-display interaction with the right Touch Sensor IC. Ever faced issues with phantom touch events or certification? Boost your R&D like a pro with our Whitepaper!


