Purpose of this manual is to show how to program Riverdi HDMI modules with RTDtool.
Before getting started with the instructions, make sure you have the proper software installed.
Run the provided RTDTool.exe software.
Connect the programmer to the computer (using the USB mini cable – connector J6)
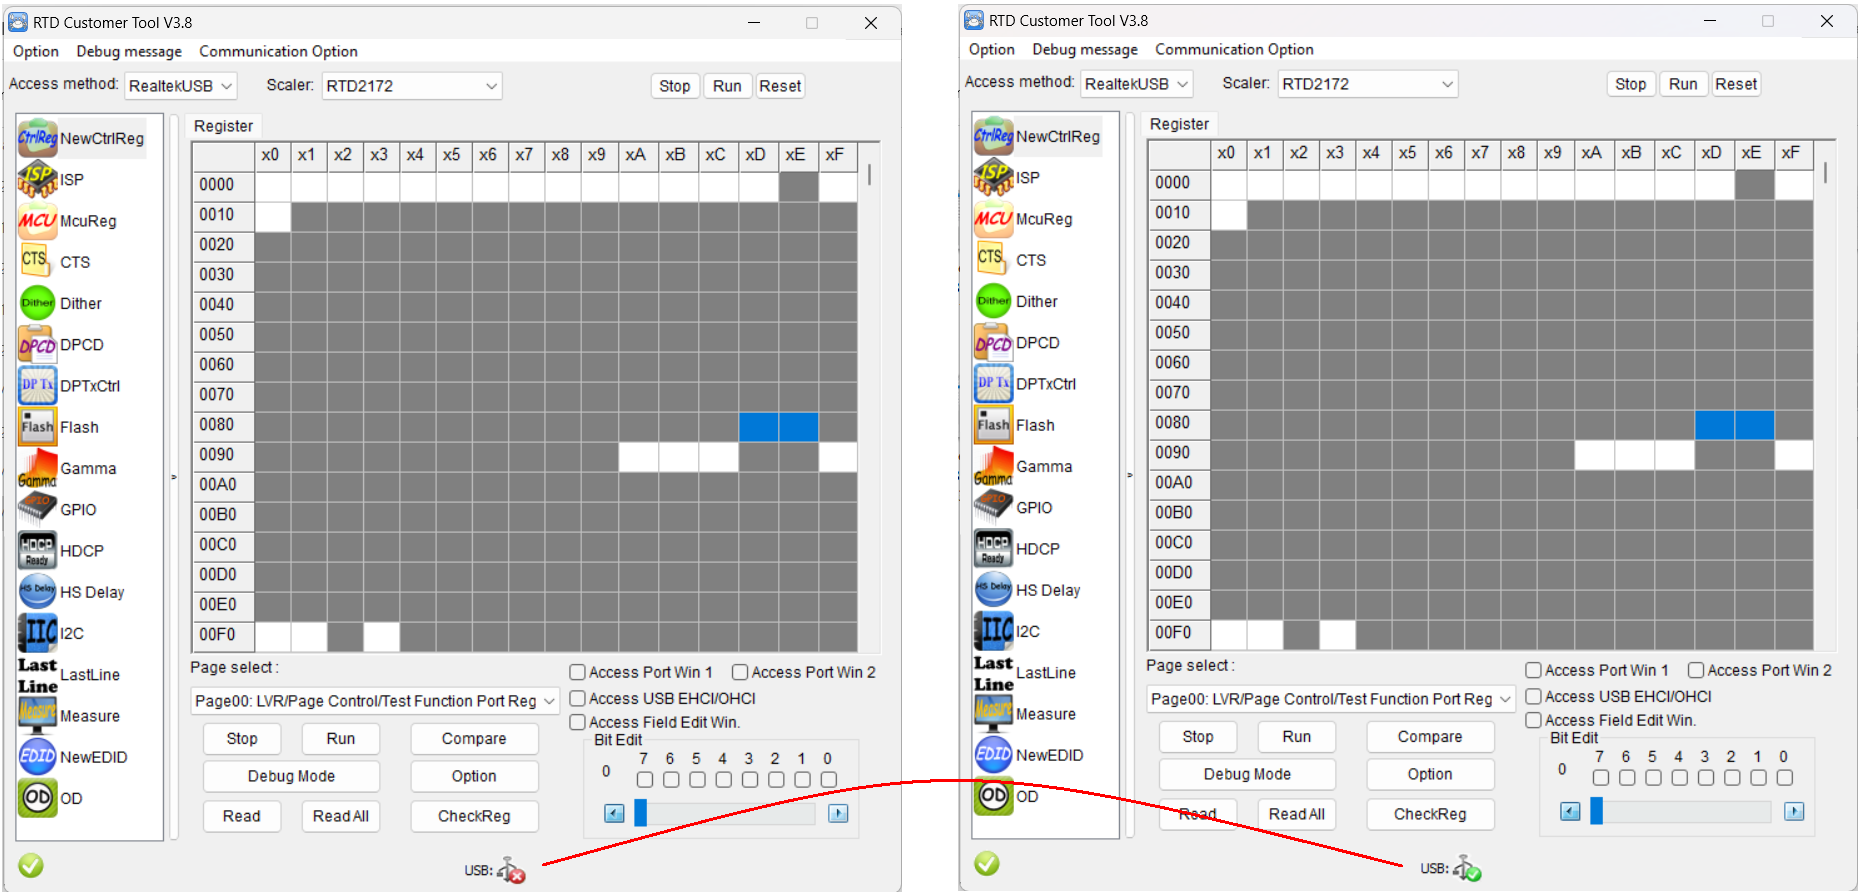
When the programmer is correctly detected by the RTDtool application, the icon representing the connection status will change:
Connect the power supply to the Riverdi HDMI display module
Connect the HDMI-HDMI cable between the supplied programmer and the Riverdi HDMI display module
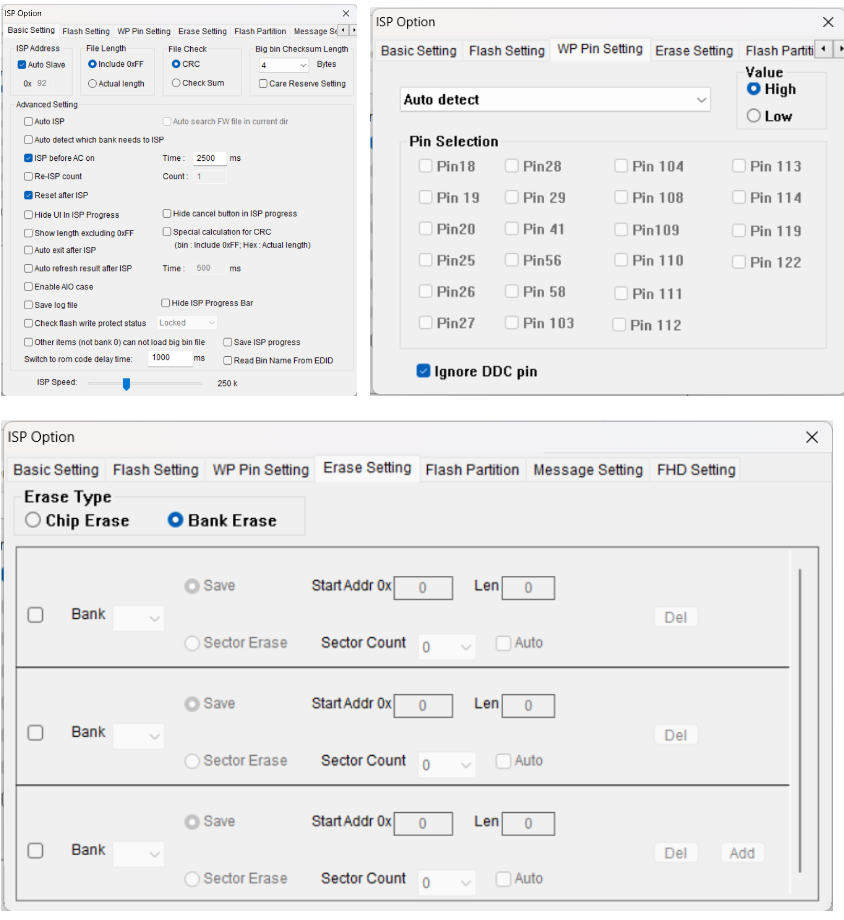
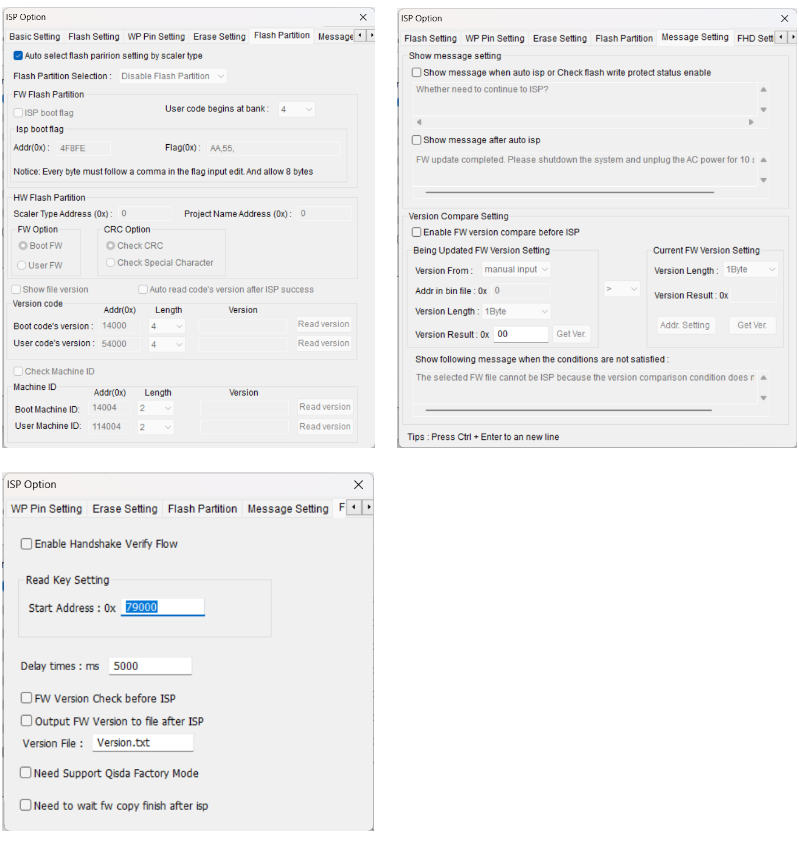
In RTDtool software, select the “ISP” tab, and then by selecting the settings icon (key and hammer symbol), make sure that the “ISP Option” settings are as follows:


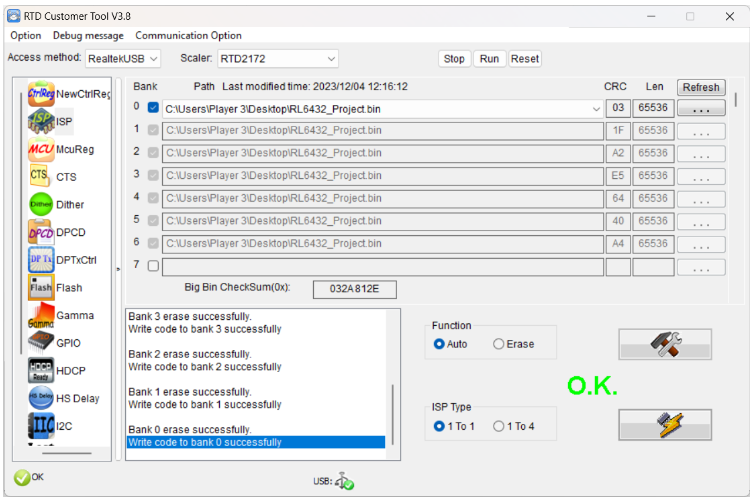
After closing the settings window, select the “…” symbol indicated below, and then select the provided file “RL6432_Project.bin“


Selecting the lightning bolt symbol starts the process of programming the circuit:


After the display module programming operation is completed successfully, the message “O.K.” will be displayed:

Riverdi HDMI display module can be disconnected from the programmer – it is ready for operation.
DISCOVER OUR
Whitepaper
Achieve the perfect user-display interaction with the right Touch Sensor IC. Ever faced issues with phantom touch events or certification? Boost your R&D like a pro with our Whitepaper!

