Getting started with a new EVE4 display controller doesn’t have to be complex.
In this guide, you’ll learn how to bring a Riverdi EVE4 display to life on STM32 Evaluation board —from first wiring to showing the initial frame.
It’s a precise, yet to the point walkthrough designed for engineers who want a solid foundation for future EVE-based projects without getting lost in unnecessary details: wire it; open the project in STM32CubeIDE; build and flash; confirm display and touch—focused on essentials; a first project you can reuse as the foundation for future, more complex applications.
Hardware

| Item | Example/PN | Notes |
| ST-Link V3/V2 | STLINK-V3 | Both versions work well |
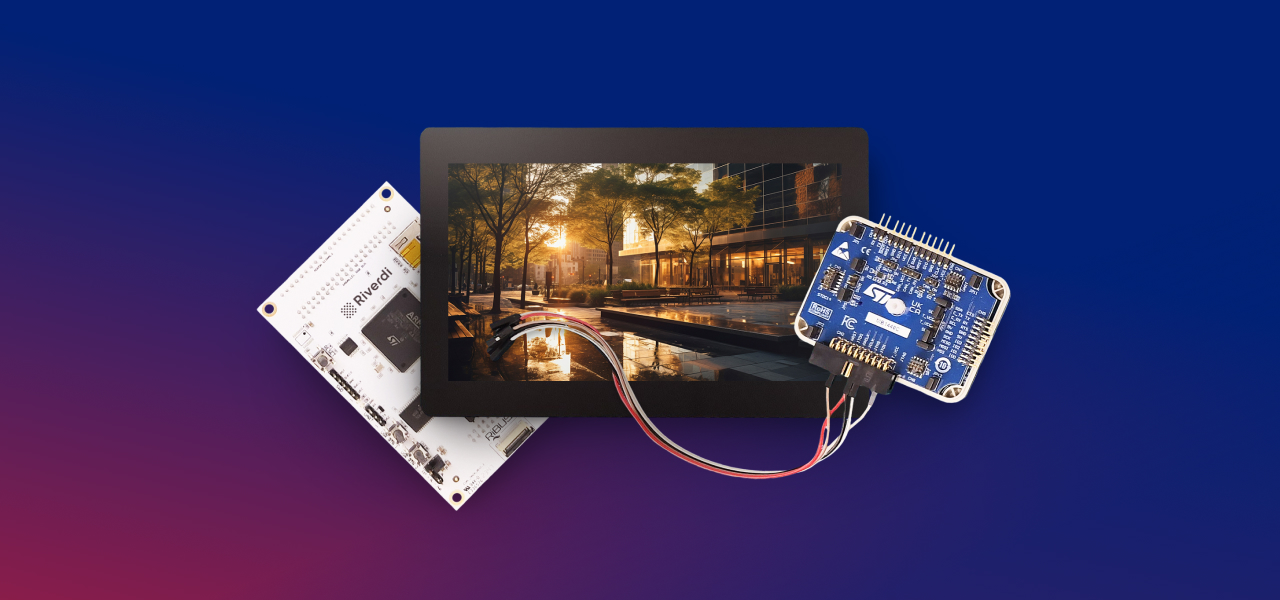
| Riverdi Evaluation Board | STM32 Evaluation Board | RiBUS compatible |
| EVE4 7″ | RVT70HSBNWC00-B | 7″ IPS, BT817Q |
| RiBUS FFC | FFC0520150 | Included in Evaluation Board and EVE4 |
| Jumper caps | — | Included in Evaluation Board |
| USB cables | 2× Micro-USB | Included in Evaluation Board and ST-Link |
| FF jumper wires | — | SWD |


RiBUS
- The blue stiffener on the FFC typically faces the connector latch (top). Insert fully, then close the latch.
- Route the cable with a gentle bend radius—no sharp folds—and make sure the contact side matches the connector footprint on both ends.
- Don’t power the board while inserting/removing the FFC.
Software
- Install STM32CubeIDE.
- (Optional) Install STM32CubeProgrammer for easy flashing via ST-Link.
- (Optional) Install Git (or plan to download a ZIP).
- Windows only: install the ST-Link USB driver (CubeProgrammer can do this).
Prefer a different environment (Keil/IAR/Make/PlatformIO)? That’s fine—this guide just uses CubeIDE for clarity.
Get the project from GitHub
Option A
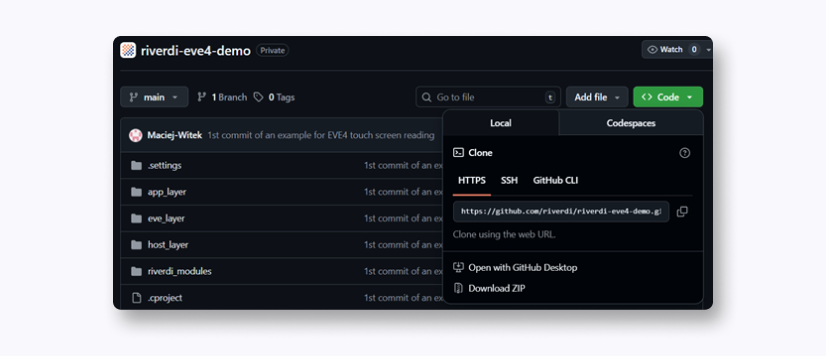
- Open the repository: Riverdi EVE demo
- Click the green Code and copy the HTTPS URL (check image below)

- Open terminal in the directory you would like to have your project in and type: git clone https://github.com/riverdi/riverdi-eve4-demo.git riverdi-eve-demo
Option B
- Open the repository: Riverdi EVE demo
- Click the green Code and Download ZIP
- Unzip to a convenient folder (e.g. … C:\Users\User1 \riverdi-eve-demo)
Import the project into STM32CubeIDE
Follow these steps to bring the cloned/unzipped repo into CubeIDE.
- In CubeIDE, go to File → New → Makefile Project with Existing Code.
- Existing Code Location: click Browse… and select your riverdi-eve folder.
- Project Name: keep the suggested name or enter your own.
- Languages: leave C and C++ checked.
- Toolchain for Indexer Settings: select MCU ARM GCC.
- Click Finish. The project will appear in Project Explorer.

If “MCU ARM GCC” isn’t listed:
- Install/repair CubeIDE components via Help → Manage Embedded Software Packages (or reinstall CubeIDE).
- Restart CubeIDE and retry the import.
Configure the project
- Pick the platform Makefile
The repo supports multiple hosts. For the Riverdi STM32 Evaluation Board (F4), use:- Makefile.stm32f4 (found in the project root)
- Rename it to become active
Rename Makefile.stm32f4 → Makefile (CubeIDE and make look for this exact filename). - Set your panel/display defines
Open the newly renamed Makefile and ensure the following flags are present (uncomment/add as needed) for a 7″ EVE4 IPS module:
# EVE generation
DEFS += -DEVE_4
# EVE4 typically uses an external oscillator
DEFS += -DEVE_4_EXTERNAL_OSC
# Panel selection (7″ IPS)
DEFS += -DIPS_70
Using a different Riverdi EVE display?
Replace -DIPS_70 with the matching define from that is commented in the Makefile (the timing block for HSIZE/VSIZE/HCYCLE/VCYCLE etc. is tied to that define).
You generally don’t need to change anything else—keep other parameters at their defaults for a first build.
Main code structure
The riverdi-eve demo uses a layered design:
- host_layer – platform bindings (SPI, GPIO, timing) for STM32, RPi, FT232H/Windows, etc.
- eve_layer – portable EVE driver (register/RAM access, command FIFO, co-processor commands).
- app_layer– helpers and app logic (DL/command buffering, touch handling, calibration, simple UI/sound).
In addition, riverdi_modules holds panel definitions (resolution, syncs, pclk, PWM defaults), and riverdi-demo.c contains the example application that stitches the layers together.
How EVE4 actually wakes up (with code breadcrumbs)
When you reset the board, the demo walks the EVE4 through a precise init sequence.
- Bring the MCU + HAL online
Before EVE can hear you, STM32 must have clocks and buses ready.- App_Common_Init() – app/board prep.
- Gpu_Hal_Init() – Bridgetek HAL for SPI/GPIO/timers.
- platform_init() – low-level clock/timer init for STM32F4.
- Wire up the link and take control
Bind control pins and guarantee a clean start.- Gpu_Hal_Open() – assigns CS, PD, INT; holds CS/PD high.
- Gpu_Hal_Powercycle() – toggles PD for a cold boot.
- Wake the GPU and verify comms
Switch to active and prove the link.- Host command → ACTIVE – EVE into Active mode.
- Clock config – program the target frequency (EVE4 typically uses the external oscillator).
- Readbacks – check device REG_ID and engine status (co-processor, touch, audio).
- Program panel timings + backlight
Describe your glass to the controller.- Write timing block: HSIZE/VSIZE/HCYCLE/VCYCLE, syncs, PCLK_POL, SWIZZLE, etc.
- Configure PWM for backlight (REG_PWM_HZ, REG_PWM_DUTY).
- Note (EVE4): you’ll also set the display clock source/frequency together with PWM so timings match the panel.
That “EVE4 note” is fine conceptually—just be explicit that you set the pixel clock and (if applicable) the PLL/display clock registers used by EVE4, then enable REG_PCLK last.
- First frame: build → flush → swap
The first image is a tiny Display List.- CLEAR_COLOR_RGB(r,g,b) – background color.
- CLEAR(1,1,1) – clear color/stencil/tag.
- DISPLAY() – end of DL.
- Flush_DL_Buffer() – copy DL to RAM_DL.
- Gpu_Hal_DLSwap(…, DLSWAP_FRAME) – make it visible.
Display List (DL) in Bridgetek EVE
Display List—what, why and why it’s good
A Display List is the per-frame script that tells EVE exactly what to draw (clear color, shapes/widgets/text, images) and ends with DISPLAY() plus a DLSWAP_FRAME to make it visible. We need it because EVE renders from a complete, ordered list – without it, partial updates would flicker and timing would be unpredictable. It’s a good solution because it batches commands (fewer SPI transfers), keeps frames deterministic (same list → same pixels), and lets the MCU build the next frame while EVE draws the current one – smooth UIs with minimal CPU load.
Typical cycle
- Build: queue commands (colors, shapes, widgets, images).
- Flush: write the bytes to RAM_DL.
- Swap: set DLSWAP_FRAME so the new list becomes visible.
This minimizes MCU↔EVE traffic and yields smooth updates even for UI animations. Example:
App_WrDl_Buffer(phost, CLEAR_COLOR_RGB(0, 64, 128));

App_WrDl_Buffer(phost, CLEAR(1,1,1));

App_WrDl_Buffer(phost, DISPLAY());

App_Flush_DL_Buffer(phost);

Gpu_Hal_DLSwap(phost, DLSWAP_FRAME);
For deeper details (command set, register map, FIFO behavior), see Bridgetek’s Programming Guide for the BT81x series.
Summary
You’ve now completed all essential steps to power up and verify your Riverdi EVE4 display on STM32—from hardware setup to rendering the first frame using Bridgetek’s EVE engine.
With this base project working, you can start exploring custom display lists, advanced touch interactions, and full UI development for your next embedded design.
DISCOVER OUR
Whitepaper
Achieve the perfect user-display interaction with the right Touch Sensor IC. Ever faced issues with phantom touch events or certification? Boost your R&D like a pro with our Whitepaper!
Go to our product catalog and see how you can save by quality, not on quality.