
Documentation is not an accessory to a product. For engineers, it is the product definition. In this article, we will walk through how Riverdi documents its display modules—starting from the product page, through mechanical drawings and 3D models, and finally diving into the datasheet structure. This guide explains:
- Where to find documentation
- What each document contains
- How to interpret critical sections
- What is always provided
- Where to find more technical resources
This structure applies across Riverdi display families.
Where to find documentation
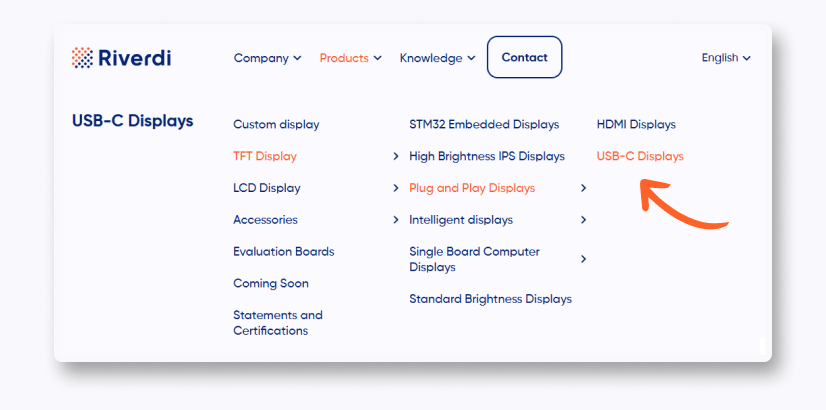
All documents are available on the product page at Riverdi website. Here is an example for Riverdi USB-C Display:
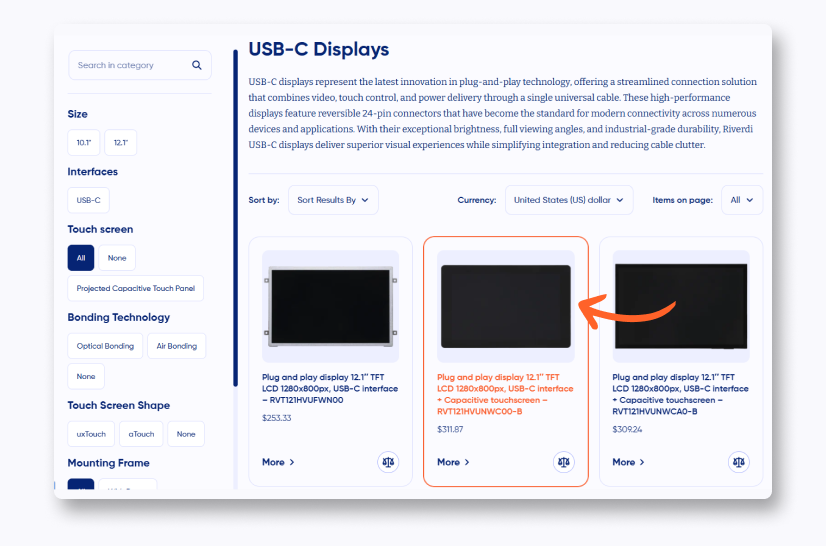
- Open product page of any USB-C display

- Choose one of the displays
- You can see provided documentation in the middle of the website
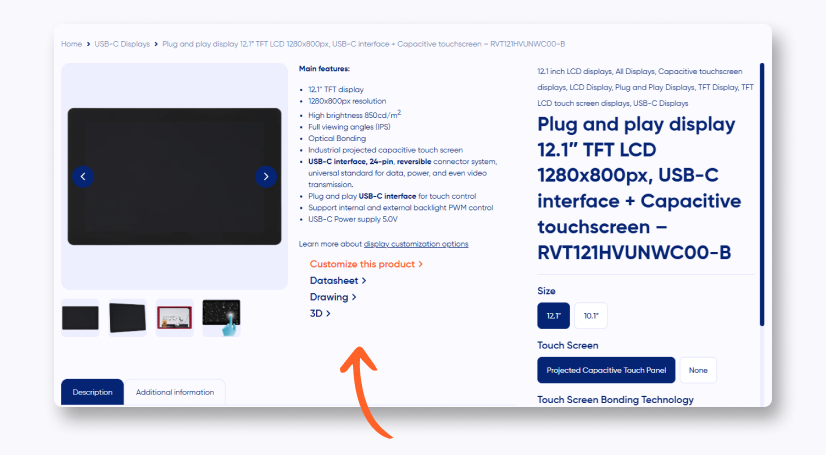
Each product page contains downloadable files and links to additional resources.
What is available on the product page
For standard Riverdi modules, the documentation typically includes:
- Datasheet
- Drawing
- 3D model (step file)
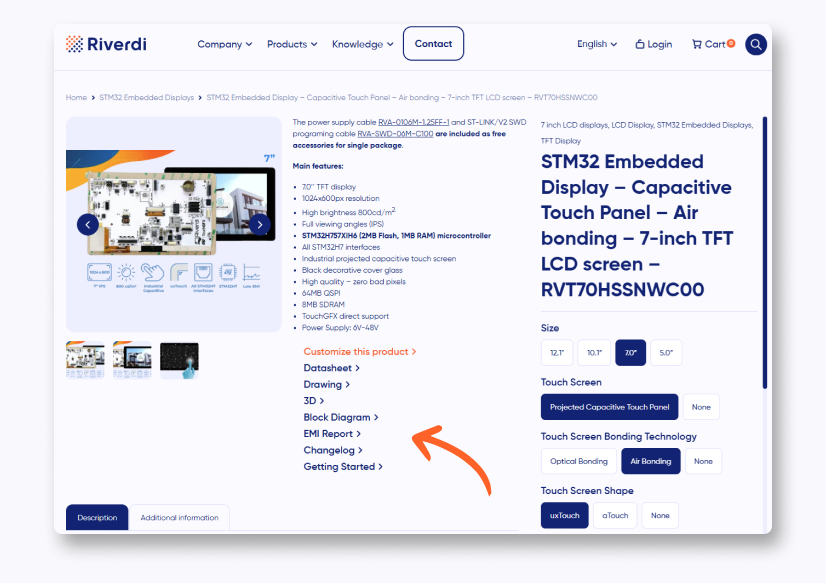
But for some other products, we provide even more. If you check out some products of our STM32 Embedded Display line, you can find there:
- Block Diagram (MCU)
- EMI Report
- Changelog
- Getting Started (Guide)
Now, we will get through our standard documentation package.
Mechanical drawing
The drawing is the mechanical definition of the module. It provides all critical physical information required for enclosure design and integration. 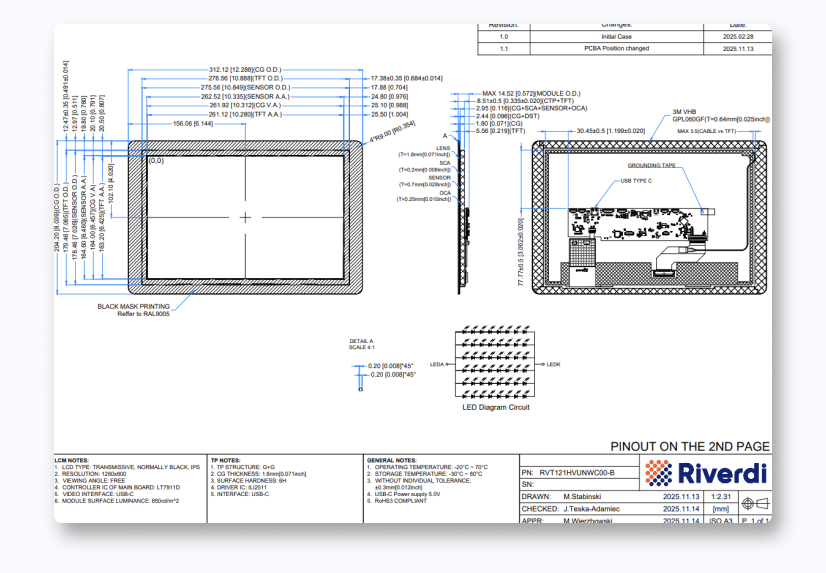 As you can see on the picture above, we describe all the important parts of our display, from top, back and side—so you can easily integrate it into your project.
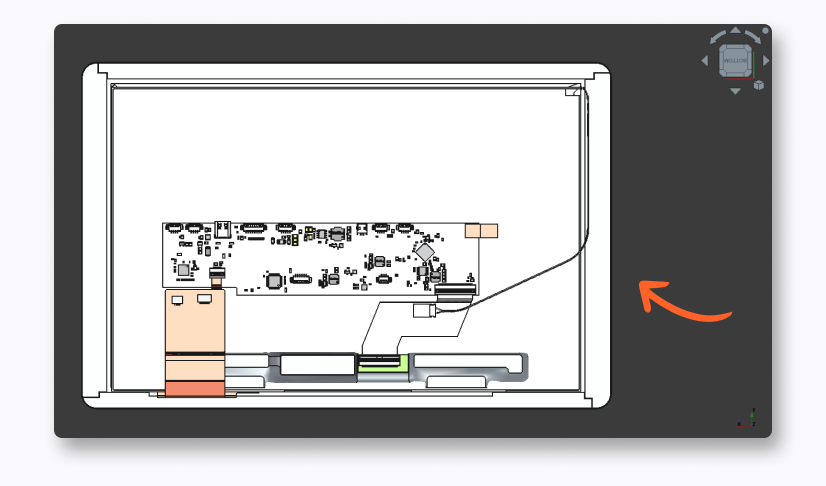
3D model
The STEP file allows direct import into CAD software of your choice. It is supported by:
- SolidWorks
- Fusion
- FreeCAD
- NX
- Other standard CAD environments
Datasheet
We always start with the part number and the description of the module. This is crucial to make sure that this is the product you actually want to verify with the datasheet. Just below, there is a revision – all the changes are noted there.
Content
Quick overview of what is included in the datasheet. Let’s you press on the paragraph to jump directly to the page where it starts.
Module classification information
Our part number broke down to pieces, where each of the pieces means something. That way, our part numbers are descriptive and let you see immediately what product you are looking at.
Assembly
How to assembly the display of your choice. Usually it’s between uxTouch and aTouch, but also if it have a frame, or don’t. In addition, there is a drawing included, so you can have a quick peek into it without opening a new tab.
Absolute maximum ratings
Those are the survival ratings of the display. Going higher the maximum rating or lower the minimum rating may not completely destroy the display, but it could potentially shorten the life of the display.
Electrical characteristics
This section defines guaranteed operating parameters. Let’s you calculate worst-case power consumption or evaluate thermal impact.
Backlight characteristics
This defines lifetime from initial brightness to 50% of that value.
Electro-optical characteristics
Those are all the real optical performance values – contrast ratio, surface luminance, chromaticity or viewing angle.
Chromaticity

Chromaticity describes the color quality of the light emitted by the display, independently of its brightness. It is defined using CIE (x, y) coordinates, which represent the position of a given color on the chromaticity diagram (you can see an example diagram above). These coordinates determine the hue and saturation of each primary color component (red, green, blue) as well as white, allowing precise characterization of how colors are reproduced. In practice, chromaticity indicates how close the displayed colors are to their intended reference values. The parameters are obtained through luminance measurements taken at multiple points across the display surface and averaged to account for spatial variations in color reproduction. This makes chromaticity a key parameter when evaluating color accuracy and consistency across different displays.
Interface description
This section defines all the external connections. For example:
- GPIO
- I2C
- USB
- External keyboard connector
- Backlight PWM & Power
- And many more depending on the product
Inspection standards This defines acceptance and rejection criteria for our validation and tests. This is important for the quality control. Reliability tests Standard qualifications tests for industrial displays – temperature, humidity, vibration tests. Legal & Contact Regulatory compliance etc.
Github
Riverdi’s Github provides plenty of example projects, demo applications and development templates. Those let you reduce bring-up time and accelerate integrations. You can base your projects on the templates provided by Riverdi.
Conclusion
Documentation should guide your work from the start. Check the product page, confirm dimensions and interfaces, and keep the datasheet close during development. This helps you avoid mistakes and move faster from first tests to a working system.
DISCOVER OUR
Whitepaper
Achieve the perfect user-display interaction with the right Touch Sensor IC. Ever faced issues with phantom touch events or certification? Boost your R&D like a pro with our Whitepaper!
Go to our product catalog and see how you can save by quality, not on quality.