In this guide, we show how to build a simple GUI application using TouchGFX and run it on three different STM32 Nucleo boards paired with Riverdi displays. The walkthrough is fully self-contained, so you can follow every step without watching the accompanying video.
Whether you’re evaluating Riverdi modules or exploring TouchGFX for the first time, this starter project demonstrates how quickly you can create interactive UI logic, generate code, integrate it in STM32CubeIDE, and run it on hardware.
Hardware used
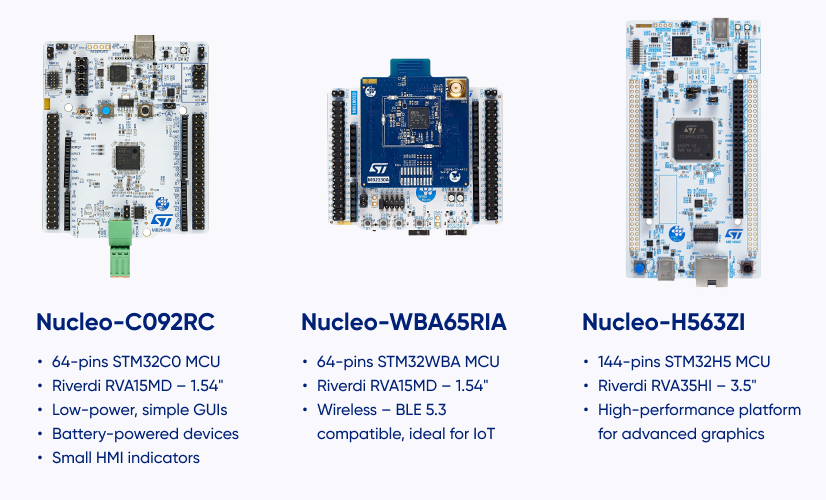
We use three STM32 Nucleo boards, each paired with a Riverdi display:
1. Nucleo-C092RC + Riverdi RVA15MD
A compact, cost-effective STM32 board great for basic TouchGFX demos and simple UX logic. Paired with the 1.54” RVA15MD round display, it’s an ideal entry setup.
2. Nucleo-WBA65RI + Riverdi RVA15MD
A more powerful, brand-new wireless Nucleo platform that offers modern connectivity and stronger GUI performance—excellent for more advanced Riverdi round-display applications.
3. Nucleo-H563ZI + Riverdi RVA35HI
A high-end, high-performance Nucleo board with plenty of memory for richer TouchGFX graphics, here driving a 3.5” RVA35HI display.
No external ST-Link is needed—all boards feature integrated ST-Link V3.
Creating your own example from scratch
Connecting the hardware
Connecting Riverdi displays to Nucleo boards takes only a moment:
- Plug the display’s FFC into the Nucleo adapter or connector.
The flex cable is keyed and fits only one way. - Connect the board using the USB-C ST-LINK port.
The green LED confirms power and debugger readiness. - No external programmer, jumpers, or adapters required.
Once connected, we move directly into UI development.
Creating the UI in TouchGFX Designer
Open TouchGFX Designer and start with a fresh project:
Step-by-step
- Click Create (the plus button on the start screen).
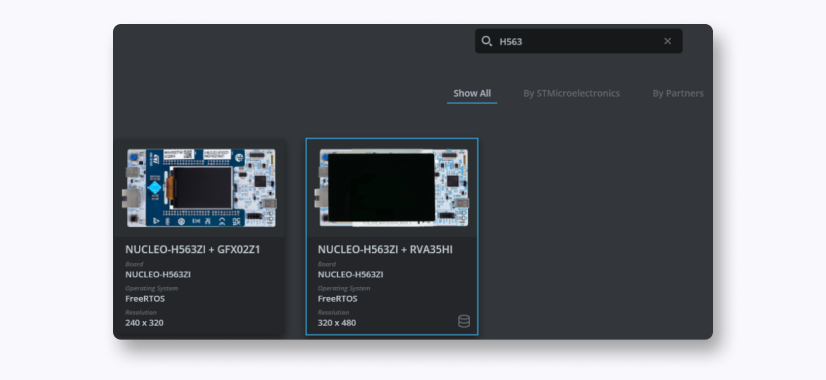
- In the Board Selector, search for your board (e.g. “H563” or “WBA65”).

- Choose proper Nucleo with Riverdi Display (RVA)
- Name your project and confirm with CREATE.
- Designer opens with a blank canvas matching your display resolution.
Building the Demo UI
To create our simple brightness-adjustment example:
- From the top toolbar, drag a Box onto the canvas.
Resize it to cover the entire screen — this will act as a white background. - Add a Slider widget.
Move it to the center by dragging it on the canvas. - Choose one of the default TouchGFX presets — in the video we use the small yellow slider.
Slider Configuration
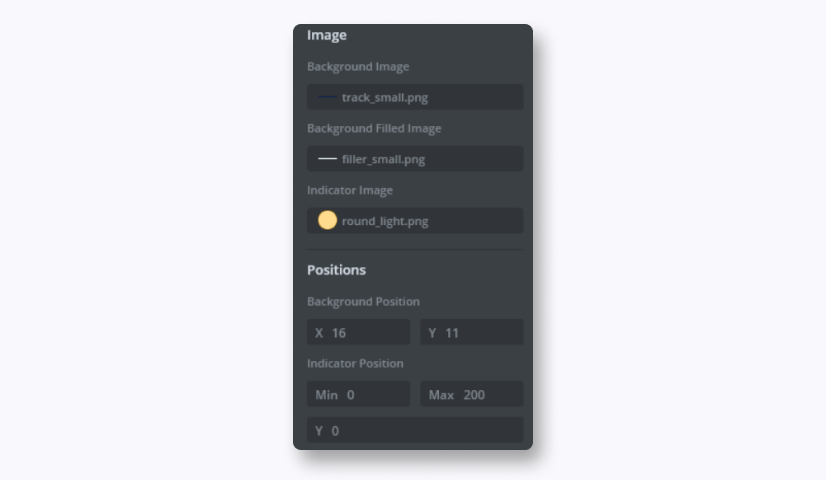
In the Properties panel:
- Set Minimum = 0
- Set Maximum = 200
- (Optional) Set Initial Value = 200 for a fully bright starting screen.
Everything added is visible in the widget tree on the left.
Adding interactions in TouchGFX
Now we link the slider to a function call:
- Open the Interactions tab.
- Press + icon to add a new interaction.
- Choose Slider value changed as the trigger.
- Select slider1 as the widget.
- For action, choose Call new virtual function.
- Name the function: sliderChanged
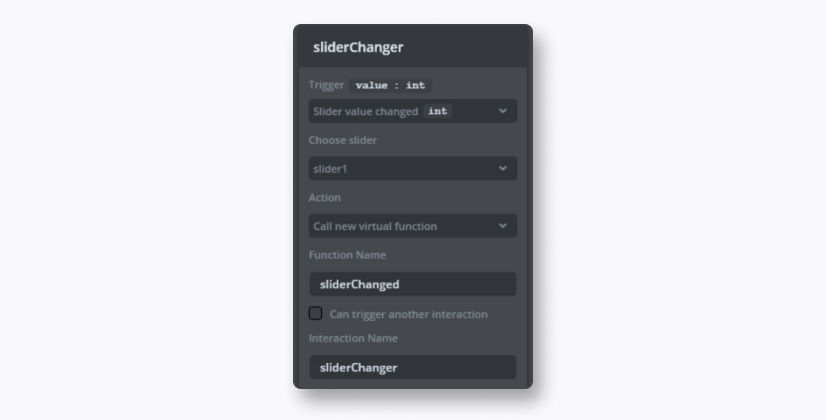
TouchGFX will generate this as a virtual method in Screen1ViewBase.
Next, we generate the code.
Generating code and opening the project in CubeIDE
Navigate to:
Application → User → gui → Screen1View.cpp
TouchGFX has already generated the callback call in the base class.
We now implement the logic in Screen1View.cpp:
void Screen1View::sliderChange(int value)
{
// Scale slider range (0–200) to alpha range (0–255)
uint8_t alpha = (value * 255) / 200;

box1.setAlpha(alpha);
box1.invalidate();
}
Be sure to add the declaration in Screen1View.hpp:
virtual void sliderChange(int value);
This is all the logic needed—no hardware drivers and no HAL code.
Testing the project: simulator & target programming
Back in TouchGFX Designer:
- Click Run Simulator (second pink icon)
→ You can test your brightness slider instantly without hardware. - Click Program and Run Target (third pink icon or F6)
→ This builds, flashes, and runs the firmware directly on your Nucleo board.
Summary
This guide demonstrates how quickly you can:
- Create a TouchGFX project
- Add UI elements
- Connect widget interactions
- Implement simple C++ logic
- Generate and build code
- Flash directly from TouchGFX Designer
- And run it on any Nucleo board paired with a Riverdi display
With Riverdi’s STM32-based modules and ST’s Nucleo ecosystem, building interactive GUIs becomes fast, predictable, and developer-friendly.
DISCOVER OUR
Whitepaper
Achieve the perfect user-display interaction with the right Touch Sensor IC. Ever faced issues with phantom touch events or certification? Boost your R&D like a pro with our Whitepaper!
Go to our product catalog and see how you can save by quality, not on quality.