This guide shows how to bring a Riverdi STM32H7 display to life using LVGL — from cloning the repository to running your first custom interface with an image and a button.
You’ll learn how to:
- connect the hardware,
- open and build the project in STM32CubeIDE,
- run the LVGL demo,
- and create a simple custom UI featuring the Riverdi logo and an interactive button.
By the end, you’ll have a working foundation for your own LVGL-based GUI project on Riverdi’s STM32 Embedded Displays.
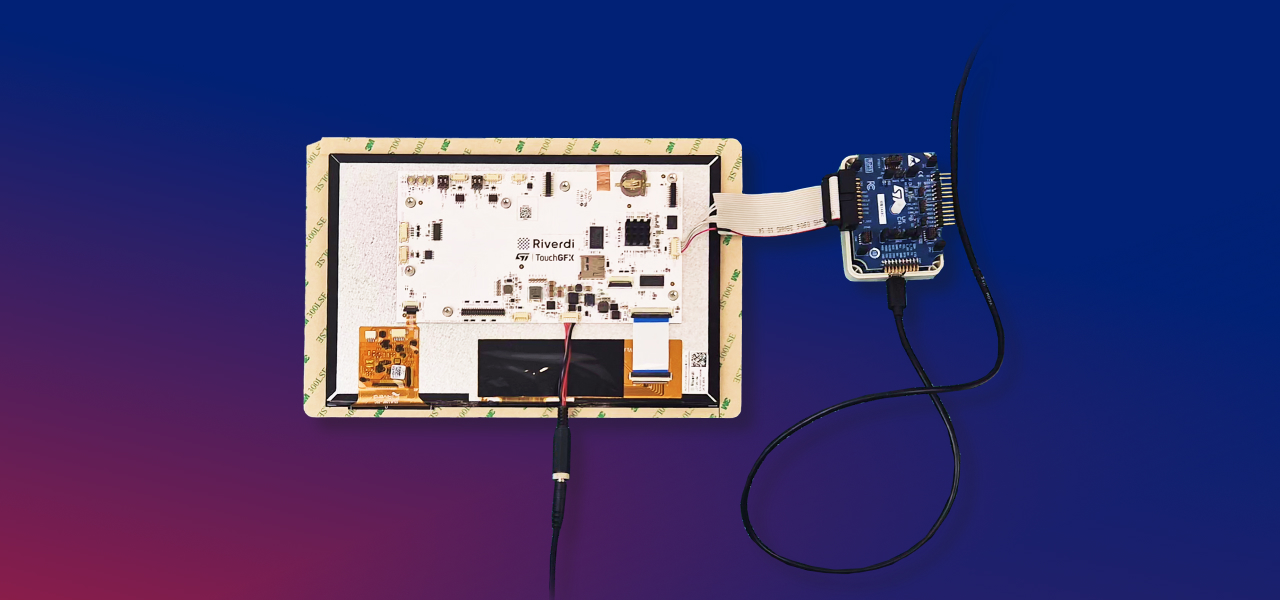
Hardware
| Riverdi Display | RVT101HVLNWC00-B | 10.1” IPS, STM32H7-based embedded display |
| Programmer | ST-Link V3 | Connected to SWD Molex on the back of the display |
| Power supply | 12 V DC | Connected to Molex power input |
| Cables | Micro-USB ×2 | One for ST-Link, one for power (if powered via USB) |
| PC | Windows/Linux/macOS | With STM32CubeIDE installed |
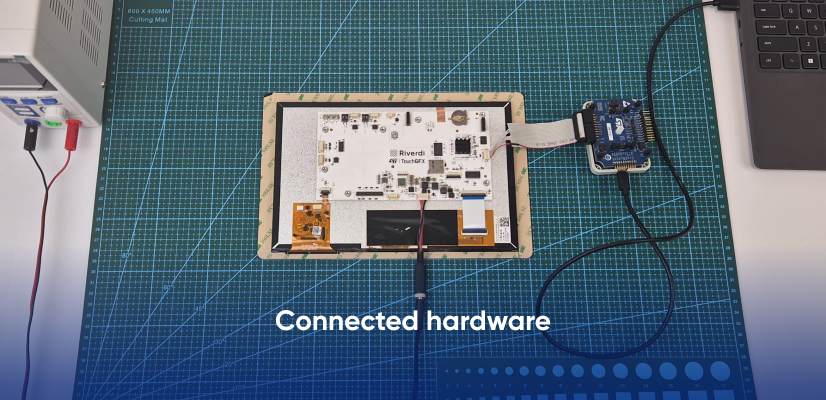
Connections
The STM32H7 display uses two Molex connectors:
- SWD (programming) – connect your ST-Link here.
- Power (12 V) – for external power supply.
⚠️ Do not power the display and connect ST-Link simultaneously for the first time without checking correct polarity.
Software
| Tool | Purpose | Download |
| STM32CubeIDE | Development, build & flash | STMicroelectronics |
| LVGL Project Creator | Project templates for Riverdi displays | LVGL.io |
| Git (optional) | Clone repositories | Git SCM |
Clone the project
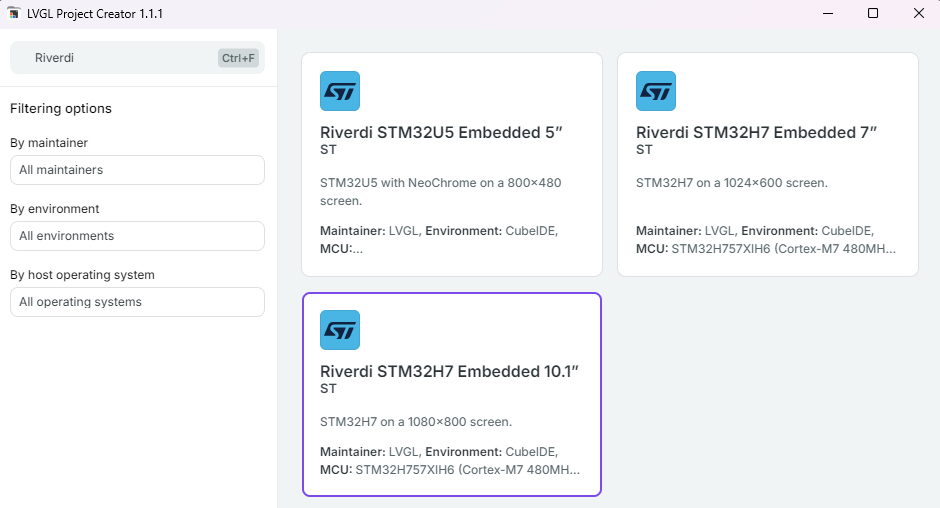
Using LVGL Project Creator please download the project for a proper screen size you are using. All you have to do is write Riverdi in the search bar on the left, press the proper project and press Download as you can see on the picture below.
Optional: clone the newest LVGL library
If you are not sure if the LVGL library you have in your project is the newest one or you just want to update it, you can simply delete the contents of the directory and download the lib manually. To do that just type this in your CLI:
cd riverdi-lvgl-101/Middlewares/Third_Party/
git clone https://github.com/lvgl/lvgl.git lvgl
Importing the project into STM32CubeIDE
- Open STM32CubeIDE.
- Go to File → Open Projects from File System…
- Click Directory…, select the subdirectory STM32CubeIDE of your cloned folder riverdi-lvgl-101.
- Click Finish.
The project will now appear in the Project Explorer.

Build and run LVGL Example
Open main.c that is located in CM7/Application/User/Core. After all the initializations, there should be a function lv_demo_widgets() that is called before PWM and kernel.
You can build the project by pressing Ctrl+B or a hammer icon in the top left side of the screen. The building process should take some time, up to a few minutes. If you see any warnings, it should be fine, it may be caused by new versions of LVGL library or CubeIDE.
If you want to check out more LVGL examples and analyze it’s code, all you need to do is open Middlewares/LVGL/lvgl/examples and call one of the example of your choice in the place where lv_demo_widgets() is called.
Create our own example
We are going to create our own example containing a picture and a button that changes the color of the screen to one of our Riverdi colors.
Step 1 – Prepare the Riverdi Logo
- Download the Riverdi logo from Riverdi website.
- Open the LVGL Image Converter.
- Choose color format: RGB565
- Click “Convert” and download the generated .c file.
- Place it next to your main.c file.
- Add this line at the top of main.c:
- extern const lv_image_dsc_t riverdi_logo;
Note: If your picture has a black background – it is caused by .png format – no background is translated by Image Converter to 0x00 – black color. If you want to make it white, just swap all 0x00 to 0xff in your IDE or text editor.
Step 2 – Add a New Source File
In STM32CubeIDE, create a new file:
Application/User/Core/ui_riverdi_logo.c
#include "lvgl.h"
extern const lv_image_dsc_t riverdi_logo;

static lv_color_t colors[3];
static uint8_t color_index = 0;
static lv_obj_t * scr;

static void color_btn_event_cb(lv_event_t * e)
{
color_index = (color_index + 1) % 3;
lv_obj_set_style_bg_color(scr, colors[color_index], LV_PART_MAIN);
}

void ui_riverdi_logo_create(void)
{
colors[0] = lv_color_make(0, 0, 255); // Blue
colors[1] = lv_color_make(0, 255, 0); // Green
colors[2] = lv_color_make(255, 0, 0); // Red

scr = lv_obj_create(NULL);
lv_obj_set_style_bg_color(scr, colors[color_index], LV_PART_MAIN);
lv_screen_load(scr);

lv_obj_t * img = lv_image_create(scr);
lv_image_set_src(img, &riverdi_logo);
lv_obj_align(img, LV_ALIGN_CENTER, 0, -40);

lv_obj_t * btn = lv_button_create(scr);
lv_obj_align(btn, LV_ALIGN_CENTER, 0, 100);
lv_obj_add_event_cb(btn, color_btn_event_cb, LV_EVENT_CLICKED, NULL);

lv_obj_t * label = lv_label_create(btn);
lv_label_set_text(label, "Change Color");
lv_obj_center(label);
}
Step 3 – Call the Function
Open main.c again and replace lv_demo_widgets(); with ui_riverdi_logo_create();
Then build and flash the project.
Note: If a build error occurs, rebuild — CubeIDE sometimes misindexes new files.
Analysis of our code
void color_btn_event_cb() – this function is an event function that is called when the button is pressed. In it’s body we change the background (bg) color to one of the colors from the colors[] array.
void ui_riverdi_logo_create() – this function is our whole ui. From the top:
- We create the screen with one of the background colors.
- We put the image to the screen and align it to the center. The following numbers are X and Y coordinates from the aligning location. In this example -40 means we place it 40px on top of the center of the screen.
- Then we create the button – by not giving it any style, it keeps it’s default look and behavior. We place it 100px below center so it shouldn’t overlap with the picture.
- At last, we create the label of the button – “Change Color”. To put it on the button, we just pass the button as a parameter in lv_label_create.
Next steps
You now have a working LVGL environment on Riverdi’s STM32H7 platform.
From here, you can:
- Add more widgets (labels, sliders, charts)
- Integrate touch gestures
- Explore animations and themes
| Resource | Link |
| LVGL Documentation | https://docs.lvgl.io |
| Riverdi GitHub | https://github.com/riverdi |
| LVGL Project Creator | https://lvgl.io/tools/project-creator |
Summary
You’ve just:
- Cloned and opened the LVGL project for the Riverdi STM32H7 display,
- Run LVGL’s demo application,
- Created your own custom screen with an image and button.
This workflow is the perfect foundation for developing professional GUIs on Riverdi’s embedded displays using LVGL.
DISCOVER OUR
Whitepaper
Achieve the perfect user-display interaction with the right Touch Sensor IC. Ever faced issues with phantom touch events or certification? Boost your R&D like a pro with our Whitepaper!
Go to our product catalog and see how you can save by quality, not on quality.